Getting the color right matters. For dental patients, a restoration that blends seamlessly with their natural teeth can be life-changing. Zirconia shade matching is one of the most critical steps in delivering a final result that looks and feels natural. When it goes well, patients leave with confidence. When it falls short, remakes and frustration follow.
At Dentek Digital, we work with dentists and dental practices across the Greater Phoenix area every day. We understand how challenging accurate shade communication can be — especially with zirconia. Therefore, we want to share what we have learned to help your practice achieve better outcomes from the start.
This guide covers the fundamentals of shade matching for zirconia restorations. Additionally, we include practical tips your team can apply right away, from shade-taking technique to how you communicate color information to your dental lab.
Why Zirconia Shade Matching Is Uniquely Challenging
Zirconia is a remarkable material. It is strong, biocompatible, and long-lasting. However, its optical properties differ significantly from natural tooth structure and from traditional porcelain restorations.
Natural teeth have translucency. Light passes through enamel and reflects off dentin beneath it. Zirconia, on the other hand, was historically more opaque. Because of this, early zirconia restorations sometimes looked flat or chalky next to natural teeth.
Modern zirconia formulations have improved dramatically. Today’s high-translucency zirconia materials allow for much more lifelike esthetics. Still, matching shade accurately requires a careful, consistent process at every step.
Opacity vs. Translucency in Zirconia
Different zirconia types behave differently under light. Standard zirconia tends to be more opaque and works well in posterior restorations where strength matters most. High-translucency zirconia performs better in the esthetic zone, where blending with adjacent teeth is critical.
Therefore, choosing the right zirconia type is the first decision that impacts shade matching. Selecting a material that is too opaque for an anterior case makes shade accuracy much harder to achieve — regardless of how precise your shade communication is.
How Staining and Glazing Affect the Final Result
Most dental labs apply surface stains and glazes to fine-tune zirconia color. Furthermore, some labs offer custom layering with porcelain over zirconia for the most demanding esthetic cases. Each finishing technique interacts with the base shade of the zirconia blank differently. As a result, your lab needs detailed information to make the right decisions during fabrication.
Best Practices for Taking an Accurate Shade
Shade-taking is a skill. Even experienced clinicians benefit from reviewing their technique regularly. Moreover, consistent habits make a real difference in how accurately your lab can match the restoration to the patient’s natural teeth.
Lighting Conditions Matter More Than You Think
Always take shades under natural or color-corrected lighting whenever possible. Dental operatory lights can create a washed-out effect on tooth color. Additionally, avoid shade-taking at the end of a long clinical day, when eye fatigue can skew your perception.
Take a moment to rest your eyes on a neutral gray surface before evaluating shade. This simple habit helps reset your color perception. Many clinicians overlook this step, but it makes a measurable difference.
Use the Right Shade Guide
Not all shade guides are created equal. Use the shade guide that corresponds to the material your lab is using. For zirconia restorations, many labs work from the VITA Classical or VITA 3D-Master system. However, your lab may use a proprietary system or a specific guide matched to their zirconia blanks.
Ask your dental lab which guide they prefer. Then use that guide consistently. Mismatched shade guides are a common source of communication errors between dental practices and labs.
Photograph the Shade Selection
A photograph showing the shade tab next to the prepared tooth — or the adjacent teeth — is one of the most valuable tools in shade communication. Furthermore, digital photos give your lab technician visual context that written shade descriptions simply cannot provide.
Use a DSLR or a high-quality intraoral camera. Take photos in the same consistent lighting conditions every time. Include close-up photos of the incisal edge, the middle third, and the cervical region separately if the tooth shows significant value or hue variation.
Communicating Shade Information to Your Dental Lab
Even when shade-taking goes perfectly chairside, the information still has to travel accurately to your lab. Therefore, how you document and submit that information is just as important as how you capture it.
Go Beyond a Single Shade Letter
A single shade designation like “A2” tells your lab the basic hue and value. However, natural teeth are rarely uniform in color. Most teeth have a lighter incisal third, a more saturated cervical region, and subtle translucency variations throughout.
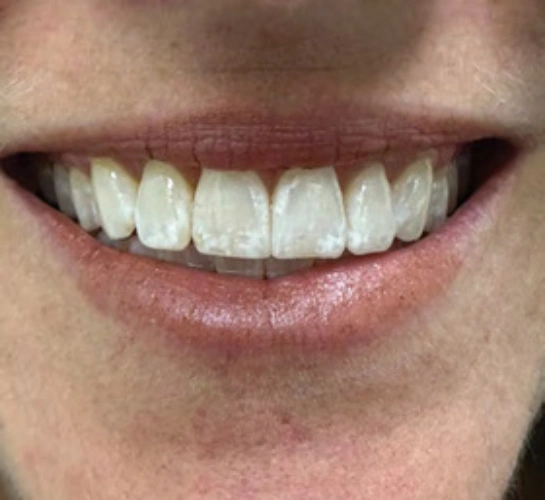
Send your lab a detailed shade map whenever possible. Note the shade at each third of the tooth. Additionally, describe any special characterizations — white spot lesions, incisal translucency, or hypocalcification areas — that should be replicated in the restoration.