Intraoral scanning has changed the way dental practices work. Dentists across the Greater Phoenix area — from Scottsdale to Chandler — are making the shift from traditional impressions to fully digital workflows. The results speak for themselves: better accuracy, faster turnaround, and improved patient comfort.
However, even the best scanner requires proper technique. A great scan is the foundation of a great restoration. Without it, even the most advanced CAD/CAM lab cannot deliver its best work.
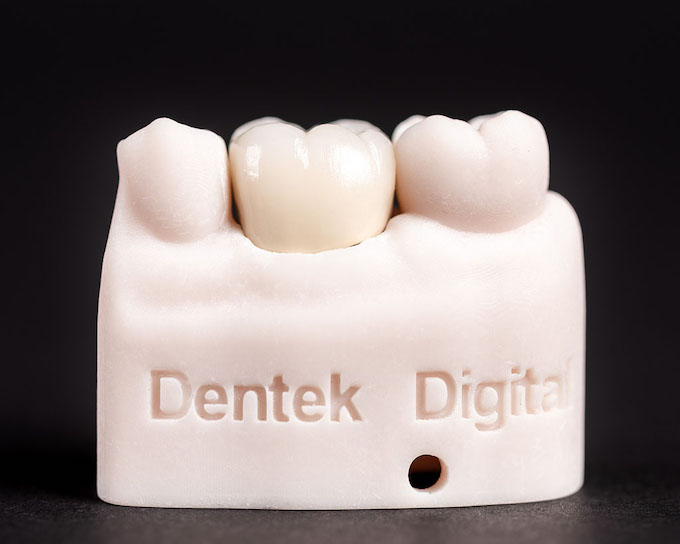
At Dentek Digital, we receive digital scans from dental practices across the Phoenix metro every day. We have seen what separates excellent scans from problematic ones. This guide shares those insights so you can get the most out of every case you submit.
Why Scan Quality Matters for CAD/CAM Restorations
Every dental restoration we fabricate begins with the data you send us. A clean, complete scan gives our technicians the detail they need to design a restoration that fits precisely. On the other hand, a poor scan forces us to make assumptions — and that increases the risk of remakes.
Therefore, improving your scanning technique directly improves your patient outcomes. It also reduces chair time, simplifies communication with the lab, and keeps your workflow moving efficiently.
The Cost of a Poor Scan
A compromised scan can lead to restorations that need adjustment or remakes. This costs you time and your patient an extra appointment. Additionally, it creates unnecessary delays in an otherwise streamlined digital workflow.
Most scan-related issues are preventable. With a few consistent habits, your team can significantly reduce these problems.
Preparing the Patient and Operatory
Good scanning starts before you pick up the wand. First, make sure the patient is positioned correctly. Their head should be at a comfortable height and angle for your scanning path.
Next, consider moisture control. Saliva, blood, and debris are the most common causes of scan artifacts. Use retractors, cotton rolls, or dry angles to keep the field clear. Also, use air to gently dry the teeth before scanning — but avoid over-drying sensitive preparations.
Managing Soft Tissue
Soft tissue management is especially important for preparation margins. The margin must be clearly visible in the scan. If tissue is covering any part of the prep, the scan will be incomplete.
Use retraction cord, laser retraction, or diode laser techniques to expose the margin before scanning. Because of this step, your digital impression will capture the detail our technicians need to design a well-fitting restoration.
Scanner Tip and Calibration
Always start with a clean, fog-free scanner tip. Warm the tip before placing it in the patient’s mouth to reduce fogging. Furthermore, calibrate your scanner regularly according to the manufacturer’s schedule. Skipping calibration is one of the most overlooked causes of scan inaccuracy.
Scanning Technique: Step-by-Step Best Practices
Technique matters more than most clinicians realize. Even high-end scanners can produce poor data when used incorrectly. Meanwhile, a skilled operator can get excellent results from a wide range of systems.
Follow these steps to build a consistent, reliable scanning routine.
Use a Consistent Scanning Path
Move the wand in a smooth, deliberate motion. Most scanners perform best when you follow a defined path — typically occlusal, then lingual, then buccal. Avoid rapid movements or sudden direction changes. Additionally, keep the wand perpendicular to the surface you are scanning to capture accurate geometry.
Capture the Full Arch
Always scan the full arch, not just the quadrant. A full-arch scan gives our team the context needed to design restorations that work in harmony with the rest of the dentition. In addition, capture the opposing arch and a buccal bite registration so we can articulate the case accurately.
Check the Scan Before Dismissing the Patient
Never dismiss the patient before reviewing the scan. Look for voids, missing margin detail, or areas with poor tissue management. If you spot a problem, rescan that section immediately. Therefore, you avoid calling the patient back for a retake later.
Dental practices in Mesa and Gilbert have found that building a brief scan review step into every appointment dramatically reduces lab communication issues. It takes only a minute and saves significant time down the line.
Common Scanning Mistakes to Avoid
Even experienced clinicians make scanning errors. However, knowing the most common pitfalls helps you avoid them before they become a problem.
- Scanning over debris or saliva: Always clear the field before scanning. Moisture creates artifacts that distort the digital model.
- Missing the margin: The prep margin must be fully captured. Partial margin data leads to poor-fitting restorations.
- Skipping the opposing arch: Without opposing data, we cannot verify occlusion during design.
- Moving too fast: Rapid wand movement causes stitching errors in the scan data. Move slowly and steadily.
- Neglecting scanner maintenance: A dirty or uncalibrated scanner produces unreliable data. Follow your maintenance schedule consistently.
Practices in Tempe and Scottsdale that have adopted strict scanning checklists report fewer remakes and faster case approvals from their lab partners. Simple habits create consistent results.
Submitting a Great Scan to the Lab
Once you have a great scan, submitting it correctly is the next step. At Dentek Digital, we accept scans from all major systems used by practices throughout the Phoenix metro area. Moreover, our team reviews every incoming case carefully to flag any concerns before fabrication begins.
Include Complete Case Information
Always include detailed case notes with your submission. Specify the tooth number, restoration type, material preference, shade, and any clinical notes that may affect the design. For example, note any occlusal concerns, missing teeth, or implant specifics that apply to the case.
Use the Right File Format
Check with our team about preferred file formats before submitting. Most modern scanners export in open formats that are fully compatible with our design software. Additionally, confirm that the scan is fully closed and free of open mesh errors before sending.
If you are submitting an implant case, include the implant library data and position scan body information. This allows our technicians to design a restoration that seats correctly at the implant level the first time.
Intraoral Scanning for Different Restoration Types
Different cases have different scanning requirements. Understanding these differences helps you prepare each scan with the right level of detail.
Single Crowns and Bridges
For single crowns and multi-unit bridges, margin clarity is the top priority. Capture the full prep with clean, unobstructed margin visibility. Also, ensure the adjacent teeth are fully scanned to allow for proper contact point design.
Implant Cases
Implant cases require scan body placement before scanning. The scan body registers the implant position in three dimensions. Therefore, always confirm that the scan body is fully seated and clean before beginning the scan. Scan bodies with saliva or debris on them will produce inaccurate position data.
Removables and Partial Cases
For removable cases, capture the full arch and all soft tissue anatomy. Our team uses this data to design frameworks and bases that fit accurately and comfortably. In addition, include any existing dentures or partials in the scan if they are relevant to the new design.
Frequently Asked Questions About Intraoral Scanning
What is the most common reason a scan gets rejected by the lab?
Missing or unclear margin detail is the top reason. When the prep margin is not fully visible in the scan data, the lab cannot design an accurate restoration. Always check margin visibility before dismissing the patient.
Do I need to scan the full arch for a single-tooth restoration?
Yes. A full-arch scan gives the lab the context needed to design proper contacts and occlusion. Quadrant-only scans are generally not recommended for most restoration types.
Can I submit scans from any intraoral scanner to Dentek Digital?
We work with scans from all major platforms used by practices in the Phoenix area, including those in Chandler, Mesa, Gilbert, Scottsdale, and Tempe. Contact our team to confirm compatibility with your specific system.
How do I know if my scan has enough detail for fabrication?
Review the scan on your software before submission. Look for voids, open areas, or missing margin segments. If the digital model looks incomplete in any critical area, rescan before sending.
What should I include with my scan submission for implant cases?
Include the scan body data, implant system information, restoration type, material preference, and any occlusal or aesthetic notes. The more detail you provide, the more precisely our technicians can design and fabricate your restoration.
Partner with a Lab That Understands Digital Workflows
Intraoral scanning is only as powerful as the lab behind it. At Dentek Digital, we were one of the earliest digital dental labs in the country to adopt a fully digital CAD/CAM workflow. We have spent years refining our process to deliver precise, reliable restorations for practices across Greater Phoenix.
We understand the nuances of scan data. Our technicians review every case with a trained eye, and we communicate proactively when we spot anything that could affect the outcome. As a result, you get fewer surprises and more predictable results.
Whether you are in Scottsdale, Chandler, Mesa, or anywhere in the Phoenix metro, we are ready to support your digital workflow. Contact Dentek Digital today to send us a case or discuss your next restoration with our team.