Accurate impressions are the foundation of every great dental restoration. Today, digital scanning has replaced traditional putty impressions in many forward-thinking dental practices across the Greater Phoenix area. The result? Faster turnaround times, fewer remakes, and better-fitting restorations for patients.
However, even the best intraoral scanner can fall short without the right technique. Therefore, knowing how to use your scanner correctly is just as important as choosing the right device. This guide covers the best practices every dental professional should follow to get the most from digital scanning workflows.
At Dentek Digital, we work with dentists throughout Phoenix, Scottsdale, Chandler, and Mesa every day. Because of this, we see firsthand how scanning quality directly affects the final restoration. These tips come from real-world experience on both sides of the digital workflow.
Why Digital Scanning Matters in Modern Dentistry
Traditional impressions have served dentistry well for decades. However, they come with real limitations — distortion, patient discomfort, and potential for error during shipping or pouring. Digital scanning eliminates many of these risks.
With a high-quality intraoral scan, your dental lab receives an accurate 3D model immediately. As a result, your lab can begin fabricating restorations faster and with greater precision. This benefits both your practice and your patients.
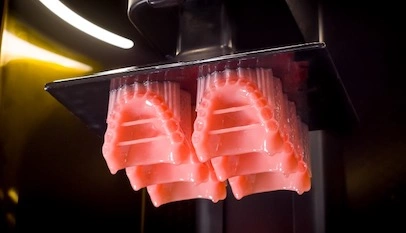
Furthermore, digital workflows integrate seamlessly with CAD/CAM dentistry, the technology we use at Dentek Digital to design and mill every restoration. A clean scan is the first step toward a perfect final product.
The Role of the Dental Lab in the Scanning Process
Your dental lab is your partner in the digital workflow. Therefore, communication between your practice and the lab is essential. When you submit a scan, your lab technician needs clear, accurate data to work with.
At Dentek Digital, our team reviews every incoming scan carefully. Additionally, we reach out when we spot potential issues before fabrication begins. This proactive approach helps prevent remakes and delays.
Preparing the Patient and Operatory for a Successful Scan
Preparation is everything. A well-prepared patient and a well-organized operatory set you up for a clean scan every time. Moreover, small steps before you pick up the scanner can save significant time later.
Control Moisture and Saliva
Moisture is one of the biggest enemies of a good intraoral scan. Even small amounts of saliva or blood can cause artifacts in your scan data. Therefore, use proper isolation techniques before you begin scanning.
Retraction cord, dry angles, cheek retractors, and air drying all help keep the field clear. Additionally, a good saliva ejector and evacuation system make a real difference. Take the time to isolate well — it pays off in scan quality.
Prepare the Tooth and Margin Clearly
For prep scans, the margin must be clearly visible and cleanly finished. Because of this, proper tissue management is critical before scanning begins. Healthy, retracted tissue gives your scanner and your lab a clear view of the preparation.
Use your preferred retraction technique to displace tissue gently. Then confirm the margin is fully exposed before beginning the scan. A clearly defined margin means your lab can design the restoration with confidence.
Best Practices During the Scanning Process
Once the patient is prepared, technique during the scan itself makes the biggest difference. Therefore, follow a consistent, systematic approach every time you scan.
Move at the Right Speed
Moving too fast is one of the most common scanning mistakes. Most intraoral scanners need time to capture and stitch data accurately. As a result, a slow, steady motion produces significantly better scan quality than rushing through.
Follow the recommended scanning path for your specific device. Additionally, practice your technique regularly so it becomes natural. Consistency leads to cleaner scans and fewer issues at the lab.
Use the Correct Scanning Sequence
Most scanner manufacturers recommend a specific sequence — often starting with the prepared arch, then the opposing arch, then the bite registration. Following this order ensures your scanner captures all the data it needs. Furthermore, it reduces the chance of missing critical areas.
Always capture the full arch, not just the prep area. Your lab needs surrounding tooth structure and landmarks to design a restoration that fits naturally. Also, make sure your bite scan accurately reflects the patient’s occlusion.
Check the Scan Before You Send
Before submitting, review your scan carefully on the scanner screen. Look for voids, blurry areas, or missing data — especially around the margin. Then rescan any areas that appear incomplete rather than sending a partial dataset.
Most scanners allow you to patch or rescan specific areas without starting over. This feature saves time and improves accuracy. Moreover, taking two extra minutes to review your scan can prevent days of delays from a remake.
Common Digital Scanning Mistakes to Avoid
Even experienced clinicians make scanning errors. However, most mistakes are predictable and preventable. Here are the most common issues we see at Dentek Digital and how to avoid them.
- Insufficient tissue retraction: Always retract before scanning, not after. A hidden margin leads to a poorly fitting restoration.
- Excessive moisture: Saliva and blood cause scan artifacts. Isolate thoroughly and air dry the preparation before scanning.
- Moving too quickly: Slow down your scanning motion. Speed sacrifices accuracy.
- Skipping the bite scan: An accurate occlusal record is essential for proper function. Never skip this step.
- Not reviewing the scan: Always inspect your scan before sending. Catching issues early saves time for everyone.
- Poor communication with the lab: Include case notes, shade information, and any special instructions with your submission. Your lab cannot read minds.
Communicating Effectively With Your Dental Lab
A great scan is only part of the equation. In addition, clear communication with your dental lab ensures your restoration meets your exact expectations. Therefore, treat your lab submission like a prescription — be specific and thorough.
Include Complete Case Information
When you submit a digital case to Dentek Digital, include the tooth number, restoration type, material preference, and shade. Also, note any special considerations such as deep margins, implant connections, or occlusal concerns. The more context you provide, the better your technician can serve you.
Additionally, high-quality photos are always welcome. Shade photos, retracted photos, and smile photos help our team match the restoration to the patient’s natural dentition. Furthermore, photos help us spot context that a scan alone cannot capture.
Ask Questions When You Are Unsure
If you are uncertain about a scanning situation, ask your lab. At Dentek Digital, our team is always available to discuss cases, answer questions, and provide guidance. We serve practices across Phoenix, Gilbert, Tempe, and beyond — and we treat every practice as a true partner.
Moreover, a quick conversation before you scan can prevent problems downstream. Therefore, do not hesitate to reach out before submitting a complex or unusual case.
Choosing the Right Scanner for Your Practice
Not all intraoral scanners are created equal. However, the best scanner for your practice depends on your workflow, case volume, and budget. Therefore, consider your specific needs before investing.
Many excellent scanners are available today, and most are compatible with open-format labs like Dentek Digital. We accept scan files from all major intraoral scanner brands. As a result, you are free to choose the device that works best for you without worrying about compatibility.
Additionally, ease of use matters. A scanner your team feels confident using will produce better results than a technically superior device that nobody has mastered. Therefore, invest in proper training after your purchase.
Frequently Asked Questions About Digital Impression Scanning
How accurate are digital scans compared to traditional impressions?
High-quality digital scans are highly accurate and, in many cases, more consistent than traditional impressions. Because traditional materials can distort during removal or pouring, digital workflows often reduce error. However, technique still matters — a poorly taken digital scan can be just as problematic as a poor traditional impression.
What file format does Dentek Digital accept?
We accept all standard open-format scan files, including STL and other common formats. Most major intraoral scanners can export in these formats. Additionally, many scanners offer direct integration with dental labs for seamless file transfer. Contact our team if you have questions about your specific device.
How do I handle deep subgingival margins when scanning?
Deep margins require excellent tissue management before scanning. Use retraction cord or a laser to displace tissue and expose the margin fully. Then dry the area carefully before scanning. If the margin is still not fully visible, discuss your options with your lab before proceeding.
Can I use digital scanning for implant restorations?
Yes. Digital scanning works well for implant restorations when the correct scan body is in place. Make sure to use the appropriate scan body for your implant system and follow the manufacturer’s scanning protocol. At Dentek Digital, we also offer advanced digital implant planning services to support complex implant cases.
What should I do if my scan is rejected by the lab?
First, review the feedback from your lab carefully. Most scan rejections relate to missing margin data, excessive voids, or an inaccurate bite. Next, rescan the affected area using the tips in this guide. Then resubmit the corrected scan. Your lab wants to help you succeed — so treat feedback as a learning opportunity.
Partner With Dentek Digital for Your Digital Workflow
At Dentek Digital, we have been at the forefront of digital dentistry since its earliest days. We combine advanced CAD/CAM technology with skilled craftsmanship to deliver restorations that fit, function, and look exceptional. Our team proudly serves dental practices across the Greater Phoenix area, including Scottsdale, Mesa, Chandler, Gilbert, and Tempe.
Whether you are just transitioning to digital scanning or looking to refine your existing workflow, we are here to help. Furthermore, our team can review your cases, provide feedback, and support your practice every step of the way.
Ready to elevate your digital scanning results? Contact Dentek Digital today to send us a case or discuss your workflow with our experienced team. We look forward to partnering with your practice.