Digital impressions have changed the way dentists capture and send cases to the lab. However, even the best intraoral scanners can produce files that need a second look. Troubleshooting digital impressions is a skill every modern dental practice should develop. When you understand what can go wrong — and why — you save time, reduce remakes, and deliver better outcomes for your patients.
At Dentek Digital, we work with dental practices across the Greater Phoenix area, including Fountain Hills, Scottsdale, Mesa, and Gilbert. We receive digital cases every day and have seen the full range of scan challenges. Therefore, we want to share what we have learned so your team can scan with confidence.
This guide covers the most common digital impression issues, practical troubleshooting steps, and tips for building a smoother workflow with your dental lab.
Why Digital Impressions Sometimes Fall Short
Digital impressions are remarkably accurate — but they are not foolproof. Several factors can affect scan quality. Understanding those factors is the first step in troubleshooting digital impressions effectively.
Most scan issues fall into a few predictable categories. For example, tissue management, moisture control, and scanner technique are the most common culprits. Additionally, file handling and software compatibility can create problems after the scan is already captured.
Tissue and Moisture Control
Subgingival margins are one of the biggest challenges in digital scanning. If the gingival tissue covers the margin, the scanner simply cannot capture it. As a result, the lab receives an incomplete preparation boundary.
Use retraction cord, retraction paste, or an electrosurgical unit to expose the margin clearly. Also, keep the field dry. Saliva and blood scatter the scanner’s light source and produce distorted mesh data. Therefore, strong isolation is not optional — it is essential.
Scanner Movement and Stitching Errors
Intraoral scanners build a 3D model by stitching together hundreds of small images. If the scanner moves too quickly or pauses in an unusual position, the software may stitch those images incorrectly. This creates a distorted or “wavy” arch that will not seat a restoration properly.
Move the scanner at a slow, steady pace. Furthermore, follow your scanner manufacturer’s recommended scanning path. Most modern scanners perform best with a consistent occlusal-buccal-lingual sequence. Practice makes this feel natural over time.
Common File Issues and How to Resolve Them
Even a technically excellent scan can create downstream problems if the file is handled incorrectly. Many dental practices in Fountain Hills, Scottsdale, and surrounding communities send cases digitally for the first time and encounter file-related issues. Here is what to watch for.
Incomplete Arch Coverage
A full arch scan should capture all teeth, including the terminal molars. However, many scans end one or two teeth short. This limits the lab’s ability to design a restoration with proper occlusal contact references.
Always extend the scan at least one tooth distal to the preparation. In addition, confirm your scan captures the full contralateral quadrant for proper arch relationship. Review the scan in your scanner’s software before sending it. Most platforms will flag obvious gaps in coverage.
Articulation and Bite Registration Errors
A poorly captured bite registration is one of the most common reasons a case comes back for adjustment. The bite scan must register maximum intercuspation clearly and without interference.
Capture the bite from the buccal with the patient in a fully closed, comfortable position. Moreover, avoid capturing the bite when the patient is slightly open — this creates a false articulation that throws off the occlusal design. If your scanner allows multiple bite scans, take two and choose the cleaner result.
STL File Compatibility
Most labs, including Dentek Digital, work with open-format CAD/CAM dentistry workflows that accept standard STL or OBJ files. However, some scanner platforms export proprietary formats that require conversion. As a result, data can occasionally be lost or distorted during that conversion.
Confirm with your lab which file formats they accept before sending a case. Additionally, check that your scanner’s export settings are configured correctly. When in doubt, send a test file before submitting a live patient case.
Troubleshooting by Restoration Type
Different restorations place different demands on your digital impressions. Therefore, the troubleshooting approach should match the type of case you are submitting.
Single-Unit Crowns
Single crowns are the most forgiving restoration type for digital scanning. However, margin clarity is still non-negotiable. The lab needs a clean, uninterrupted margin line to design a well-fitting crown.
Focus your tissue management efforts on the prepared tooth specifically. Also, make sure the preparation is free of temporary cement residue before scanning. Cement fragments show up in the scan and can be mistaken for tooth structure.
Multi-Unit Bridges
Bridges are significantly more sensitive to distortion. Because a bridge spans multiple teeth, even minor scan inaccuracies compound across the span. As a result, a three-unit bridge may rock or show open margins if the scan data was distorted.
For bridge cases, slow your scanning pace even further through the prepared area. Furthermore, consider scanning the full arch rather than a partial segment. This gives the lab more reference points to work with and produces a more accurate model.
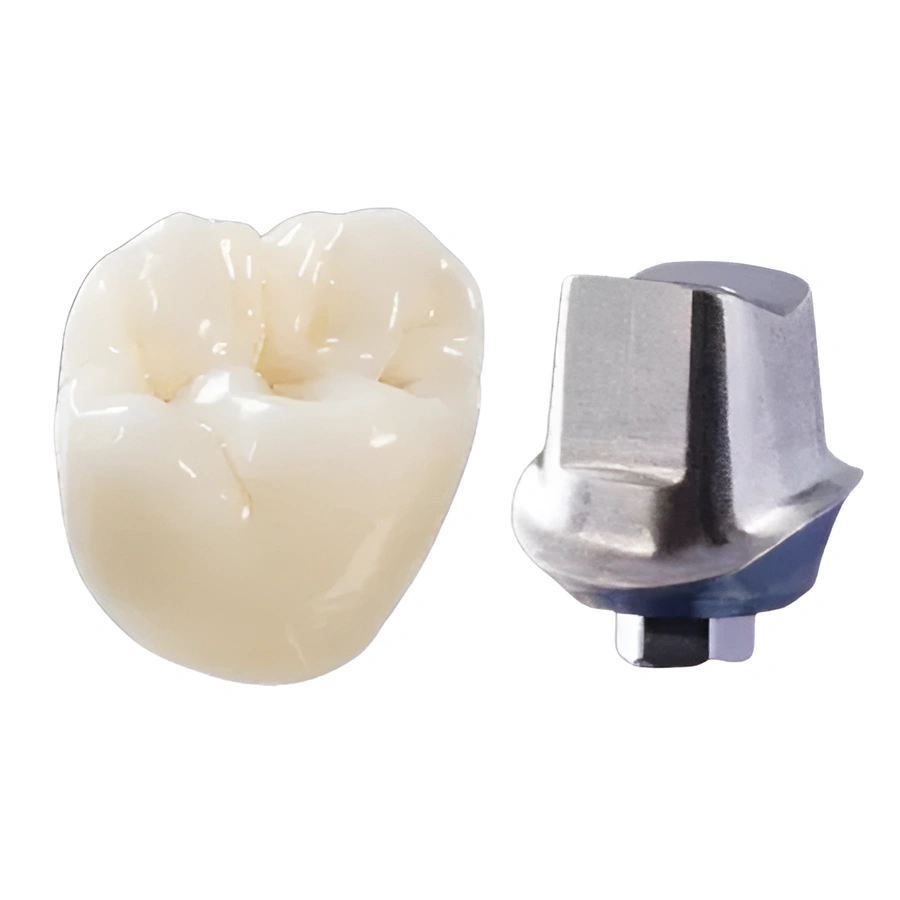
Implant Scanbodies
Implant cases require a scanbody — a physical component that attaches to the implant and gives the scanner a reference for the implant’s position. If the scanbody is not fully seated or moves during the scan, the resulting data will be inaccurate.
Confirm scanbody seating before every scan. In addition, verify that the scanbody you are using is compatible with your scanner’s library. Dentek Digital offers advanced implant solutions and can guide you on scanbody selection for your system. Contact Dentek Digital to discuss your implant cases before you scan.
Building a Better Scanning Protocol
The best way to minimize digital impression issues is to build a consistent, repeatable scanning protocol for your practice. Practices in Mesa, Gilbert, Fountain Hills, and across the Greater Phoenix area that invest in protocol development see fewer remakes and faster turnaround times.
Train Your Entire Team
Scanning should not rely on a single person. Therefore, train multiple team members so that coverage is never an issue. Most scanner manufacturers offer online training and certification courses. Additionally, Dentek Digital is always available to review scan technique with your team.
Review Scans Before Sending
Every scanner platform includes a review interface. Use it. Spend two to three minutes examining the scan before submission. Look for holes in the mesh, distorted areas, and unclear margins. Moreover, check the bite registration in the articulated view.
Catching an issue before it reaches the lab saves significant time. On the other hand, sending a flawed scan often means a phone call, a rescan, and a delayed case — which no one wants.
Communicate with Your Lab
Your dental lab is your partner in every case. Communicate clearly about case type, material preferences, occlusal scheme, and any clinical notes that affect the design. Furthermore, if you know a scan has a challenging area, note it when you send the case.
At Dentek Digital, we review every incoming scan carefully. When we spot a potential issue, we reach out before fabricating. This collaborative approach helps us deliver restorations that fit well and serve your patients for years to come.
Frequently Asked Questions About Troubleshooting Digital Impressions
What causes a wavy or distorted arch in my digital scan?
Stitching errors are the most common cause. This happens when the scanner moves too quickly or loses tracking. Slow your pace and follow a consistent scanning path to prevent this issue.
How do I know if my margin is captured clearly in the scan?
Review the scan in your software and zoom in on the prepared tooth. The margin should appear as a clean, continuous line with no gaps or tissue overlap. If it looks unclear, rescan with better tissue retraction and isolation.
Can the lab fix a poor digital impression on their end?
Labs can work with imperfect scans in some cases, but there are limits. Missing margin data or severe distortion usually requires a rescan. Additionally, asking the lab to guess at a margin puts the final fit at risk. When in doubt, rescan.
What file format should I send to Dentek Digital?
Dentek Digital accepts standard open-format files compatible with our CAD/CAM workflow. Reach out to our team before your first case submission to confirm compatibility with your specific scanner platform.
How often should I recalibrate my intraoral scanner?
Follow your scanner manufacturer’s calibration schedule. Most systems recommend calibration daily or at the start of each session. Regular calibration reduces scan drift and keeps your accuracy consistent over time.
Partner with Dentek Digital for Expert Support
Troubleshooting digital impressions gets easier when you have an experienced lab partner in your corner. Dentek Digital has been a leader in digital dentistry since the earliest days of CAD/CAM workflows. We serve dental practices throughout Greater Phoenix, including Fountain Hills, Scottsdale, Mesa, and Gilbert.
Our team fabricates high-quality fixed restorations, removables, splints, nightguards, and dental implant solutions. We also offer advanced services like TattooTH and digital implant planning. Furthermore, we combine precision technology with skilled craftsmanship on every single case.
Whether you are scanning your first digital impression or refining your existing workflow, we are here to help. Contact Dentek Digital today to send us a case or explore your options with our team.